Xconda / 2026No. 08

CINEMATIC IMAGE BLENDER

A workflow guide for AI-driven blending of character and background images into cinematic still images.

User GuideTutorial12 Chapters2026
- Guide Contents -

Purpose · Use Cases · Features · Prompt Tips · Entry · Person Image · Background Image · Prompt · Generate · Result · Manage · Detail View

Chapter 01Purpose
P. 001
01
- Purpose -

Purpose of Cinematic Image Blender

Used to generate cinematic still images by AI-blending character photos and background images.

- Traditional method -
Manual compositing in Photoshop or similar tools requires time-consuming work to match lighting and color tones.
- Cinematic Image Blender method -
Just upload a person and a background image — AI auto-matches lighting, color, and shadows. The character's face, skin tone, hairstyle, and clothing are preserved while blended into the background.
001 - PurposeOverview
Chapter 02Use Cases
P. 002
02
- Use Cases -

When to use it

Advertising images, concept presentations, SNS / marketing content, and video pre-production.

01
Product / brand ad image
When you need an ad image with a model placed in a specific background.
02
Concept presentation
When you need to show a visual draft to clients before the actual shoot.
03
SNS / marketing content
When you need to quickly generate character images with various backgrounds.
04
Video pre-production
When you need composite images for storyboards or moodboards.
002 - Use CasesWhen
Chapter 03Features
P. 003
03
- Features -

Feature overview

Person + background auto-blending, person preservation, cinematic tone application.

- 01 -

Auto-blending

Person + background
When you upload a person image and a background image, AI automatically matches lighting, color, and shadows for blending.
- 02 -

Preservation

Person identity
Facial features, skin tone, hairstyle, and clothing are preserved based on the original person photo.
- 03 -

Cinematic tone

Color grading
Cinematic color grading and lighting are automatically applied to the blended result.
003 - FeaturesCapabilities
Chapter 04Prompt Tips
P. 004
04
- Prompt Tips -

Prompt input guidelines

Describe the character's action, lighting mood, and cinematic detail concretely.

- Good examples -
"Standing by the window, rim lighting, emotional expression" / "Walking through the hallway, dramatic overhead light, cinematic mood"
- Avoid -
"Blend it" → Instruction AI cannot interpret / "Make it pretty" → Not visually specific
- Key Principle -
Describe the character's pose / action + lighting direction / mood + camera feel concretely. Person images with no background or solid-color backgrounds yield higher blending accuracy.
004 - Prompt TipsGuidelines
Chapter 05Entry
P. 005
05
- Entry -

Open Cinematic Image Blender

Click the 6th icon on the left vertical sidebar.
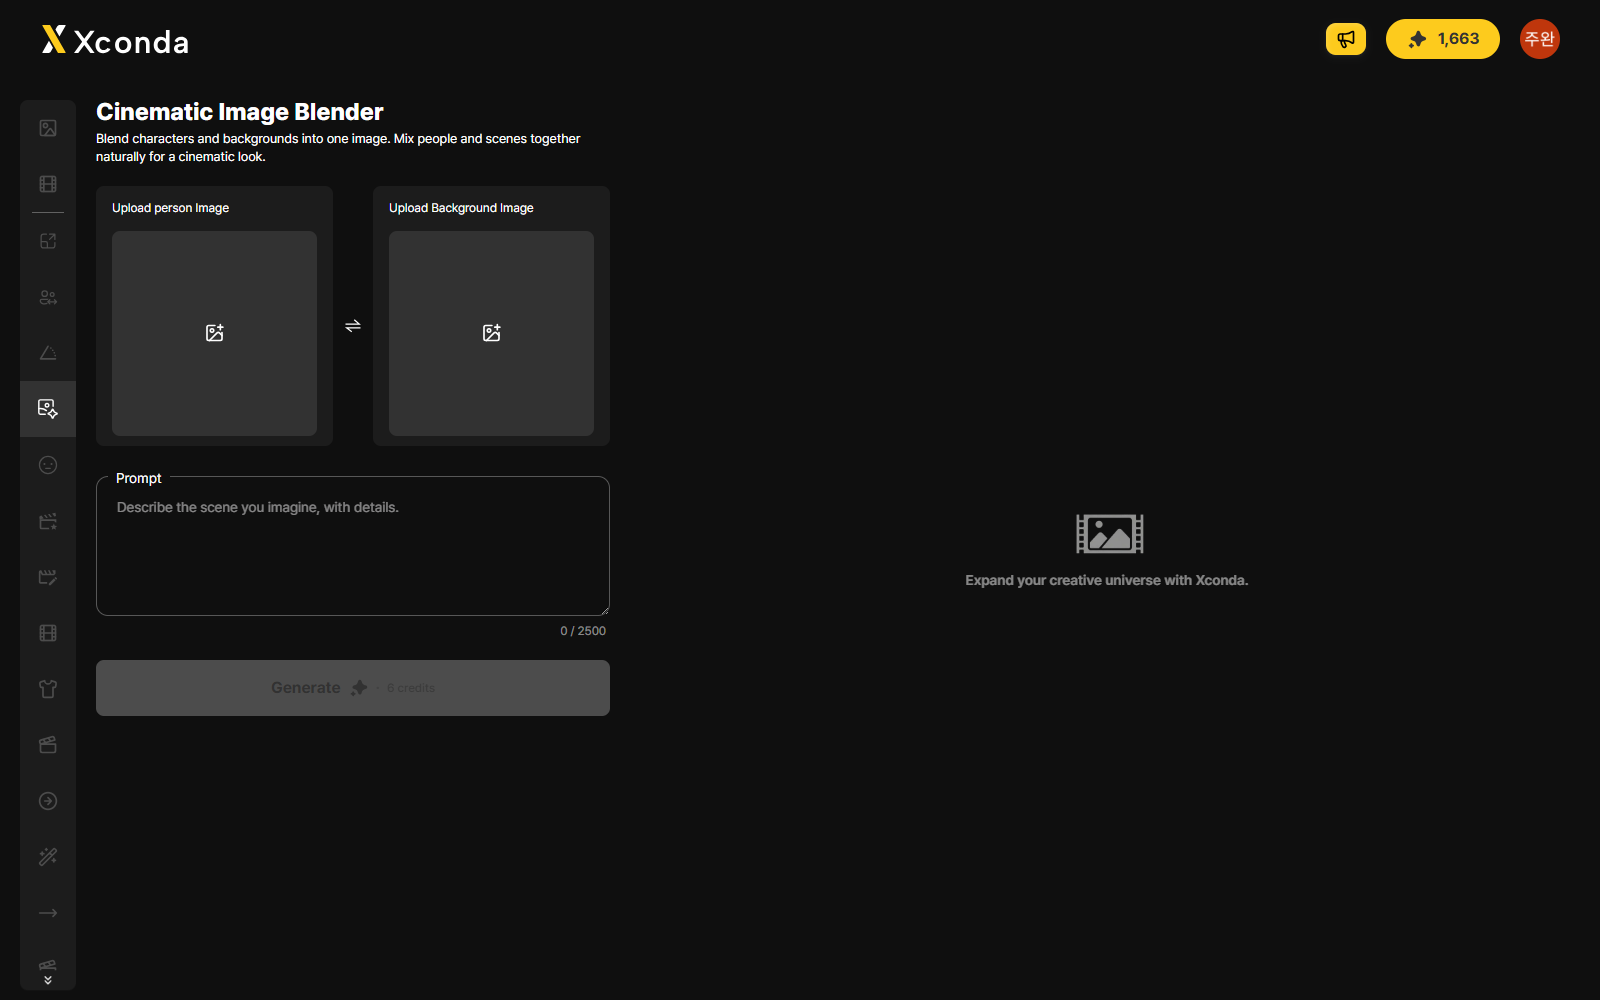
Fig. 06.01Open Cinematic Image Blender
- Open Cinematic Image Blender -
- Step 01 -

Locate the 6th sidebar icon

Find the 6th icon on the left vertical sidebar. The icon shows a landscape image with a sparkle mark.

- Step 02 -

Click to open

Click the icon to open the Cinematic Image Blender workspace.

005 - EntryOpen
Chapter 06Person Image
P. 006
06
- Upload person Image -

Upload person Image

Click the empty area in the Upload person Image field to upload a person image.
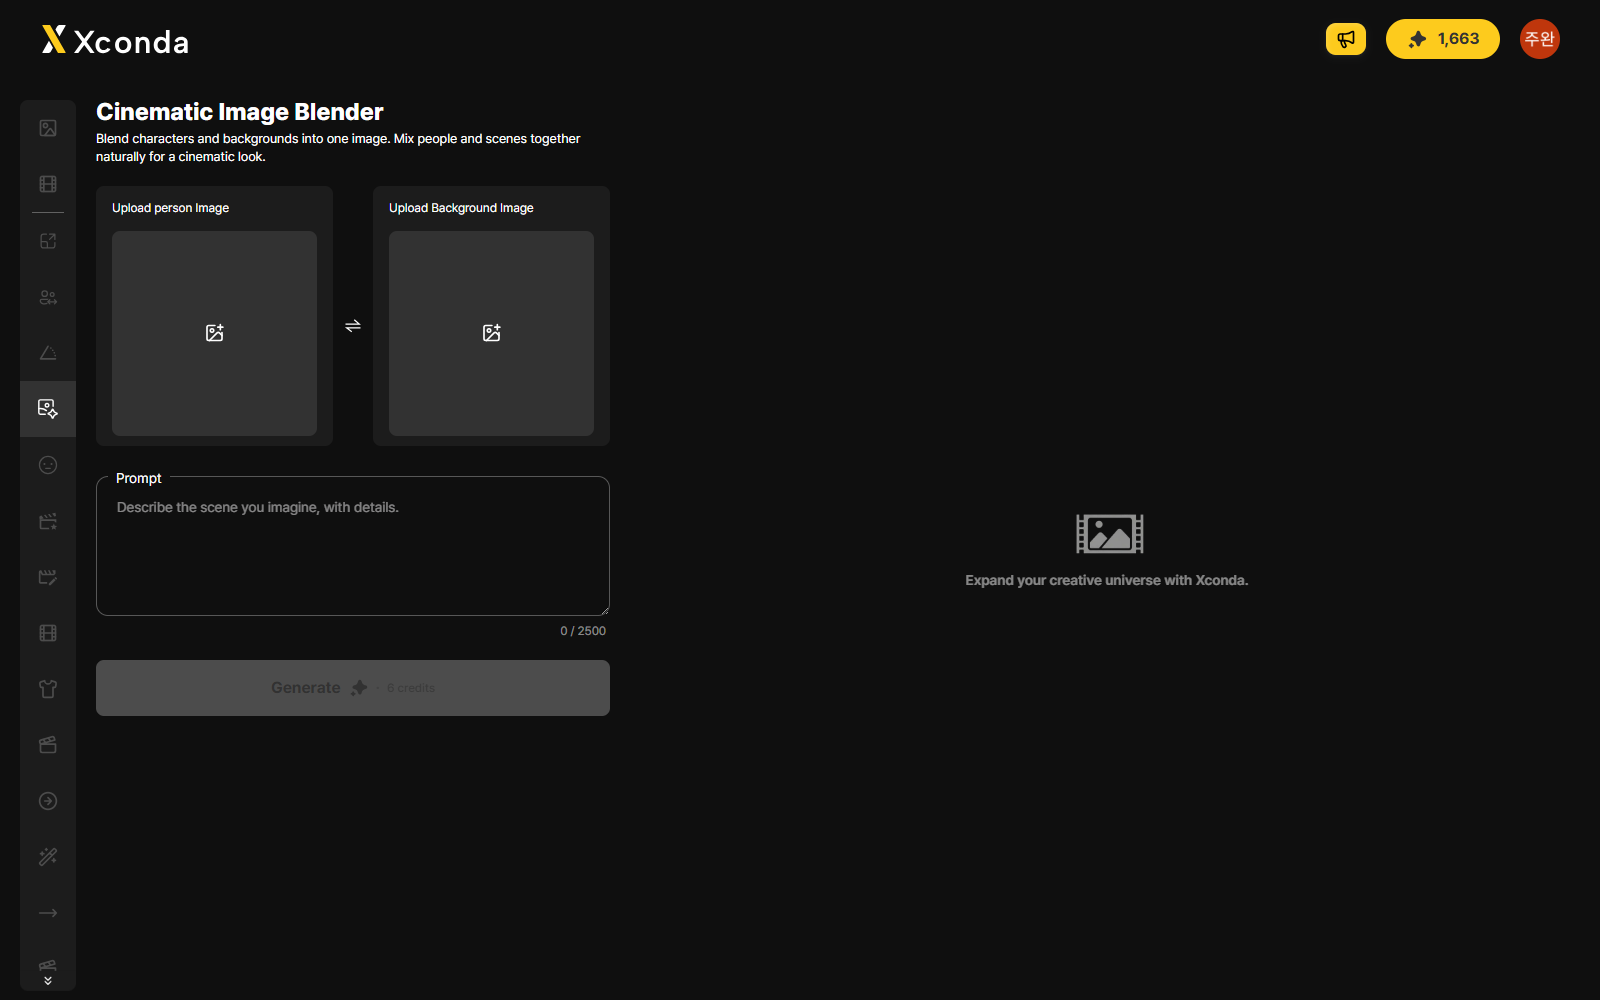
Fig. 07.01Upload person Image
- Person image upload -
- Step 01 -

Upload person image

Click the empty area in the Upload person Image field to upload a person image.

- Verify -

Preview is shown

After uploading, a preview of the person image is displayed.

- Required -
The Generate button will not activate if the image is missing.
006 - Person ImageUpload
Chapter 07Background Image
P. 007
07
- Upload Background Image -

Upload Background Image

Click the empty area in the Upload Background Image field to upload a background image.
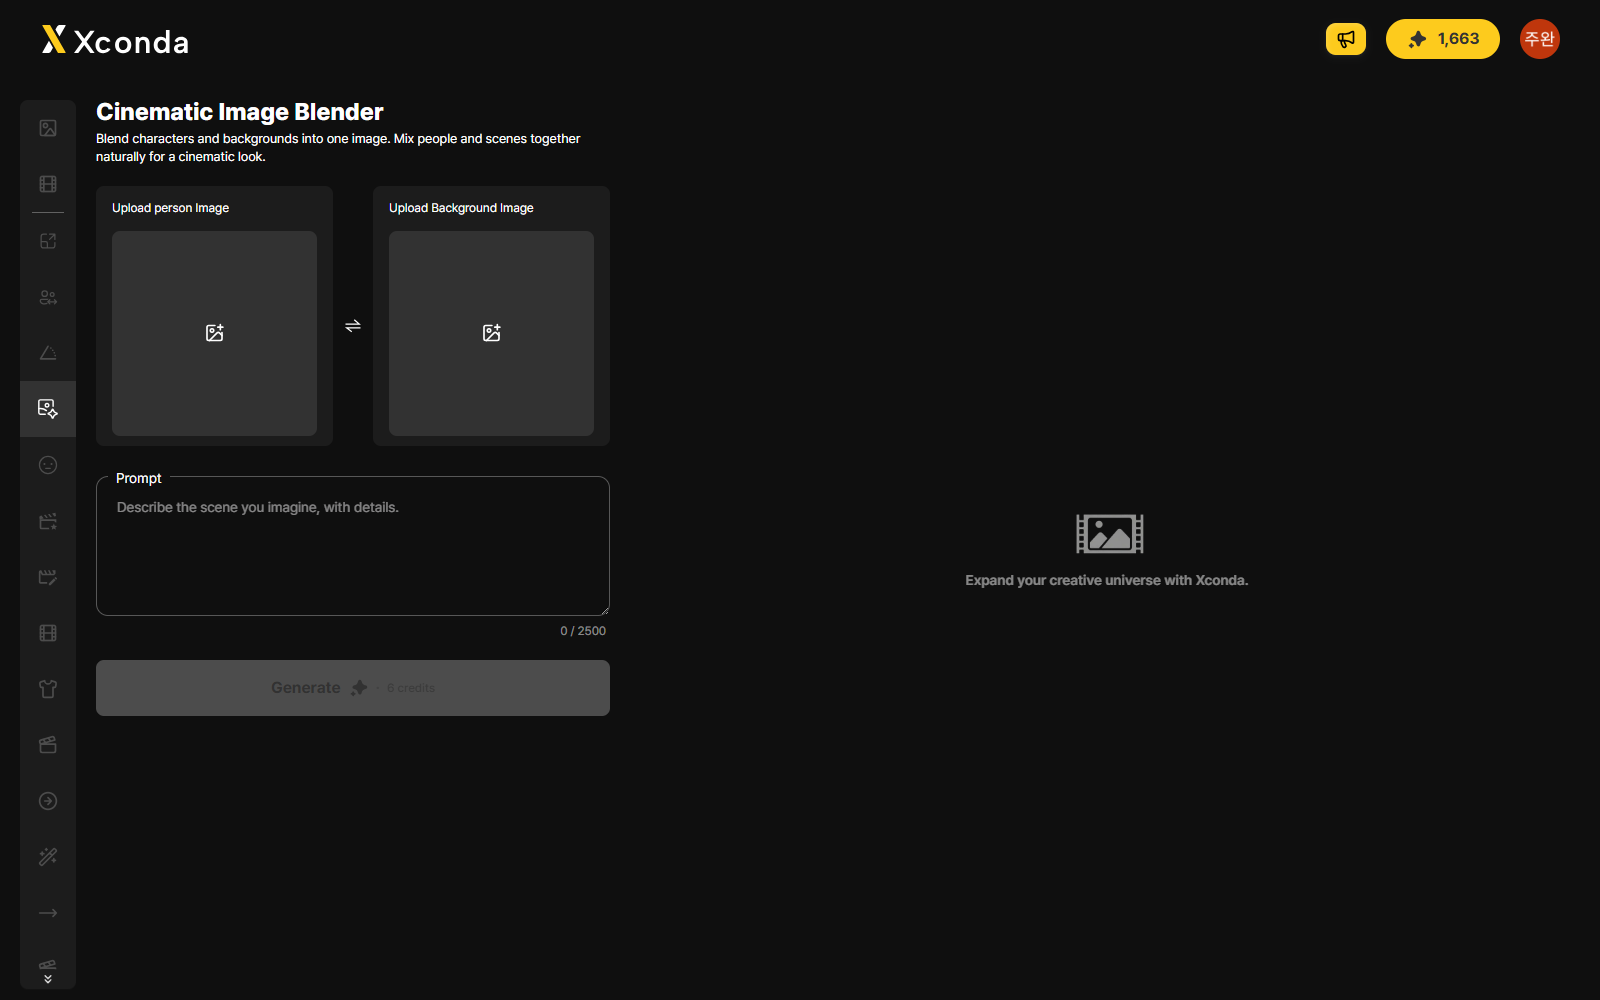
Fig. 08.01Upload Background Image
- Background image upload -
- Step 01 -

Upload background image

Click the empty area in the Upload Background Image field to upload a background image.

- Verify -

Preview is shown

After uploading, a preview of the background image is displayed.

- Required -
The Generate button will not activate if the image is missing.
007 - Background ImageUpload
Chapter 08Prompt
P. 008
08
- Prompt -

Enter the Prompt

Click the Prompt input field and enter the situation, lighting, and camera feel as text.
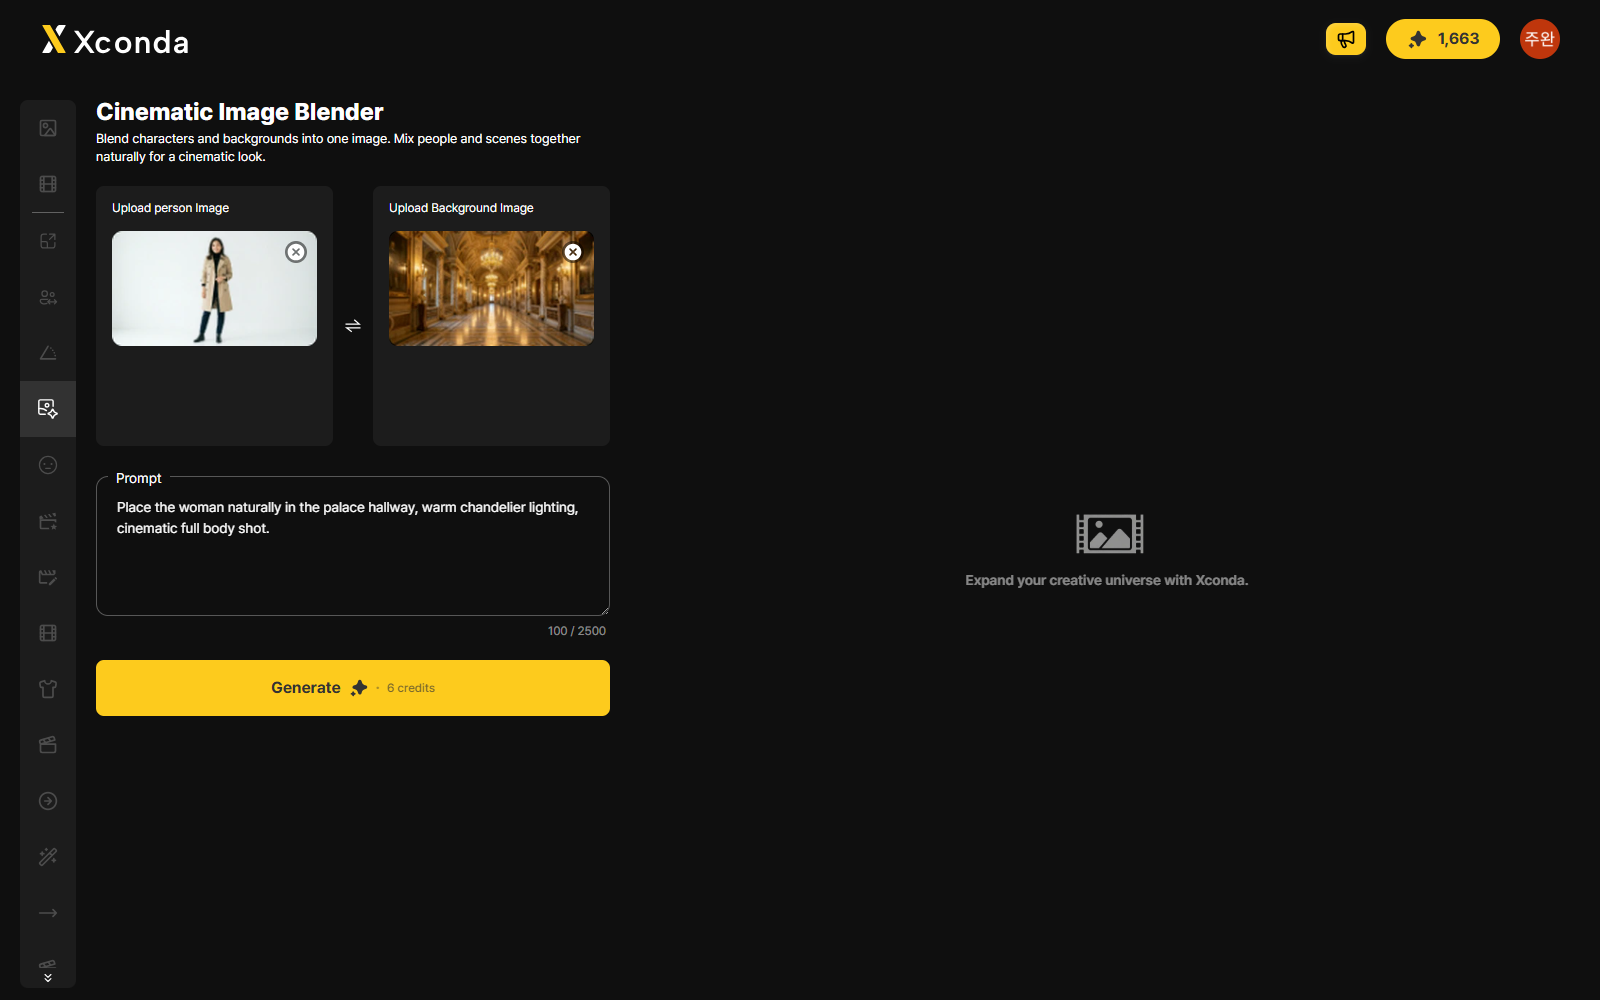
Fig. 09.01Enter the Prompt
- Prompt input -
- Step 01 -

Click the input field

Click the Prompt input field. Enter the situation, lighting, and camera feel as text.

- Display -

Placeholder

The input field shows the placeholder Describe the scene you imagine, with details.

- Counter -

0 / 2500 format

Character count is displayed in 0 / 2500 format.

008 - PromptInput
Chapter 09Generate
P. 009
09
- Generate -

Click the Generate button

After uploading person and background images and entering any required prompt, click the yellow Generate button.
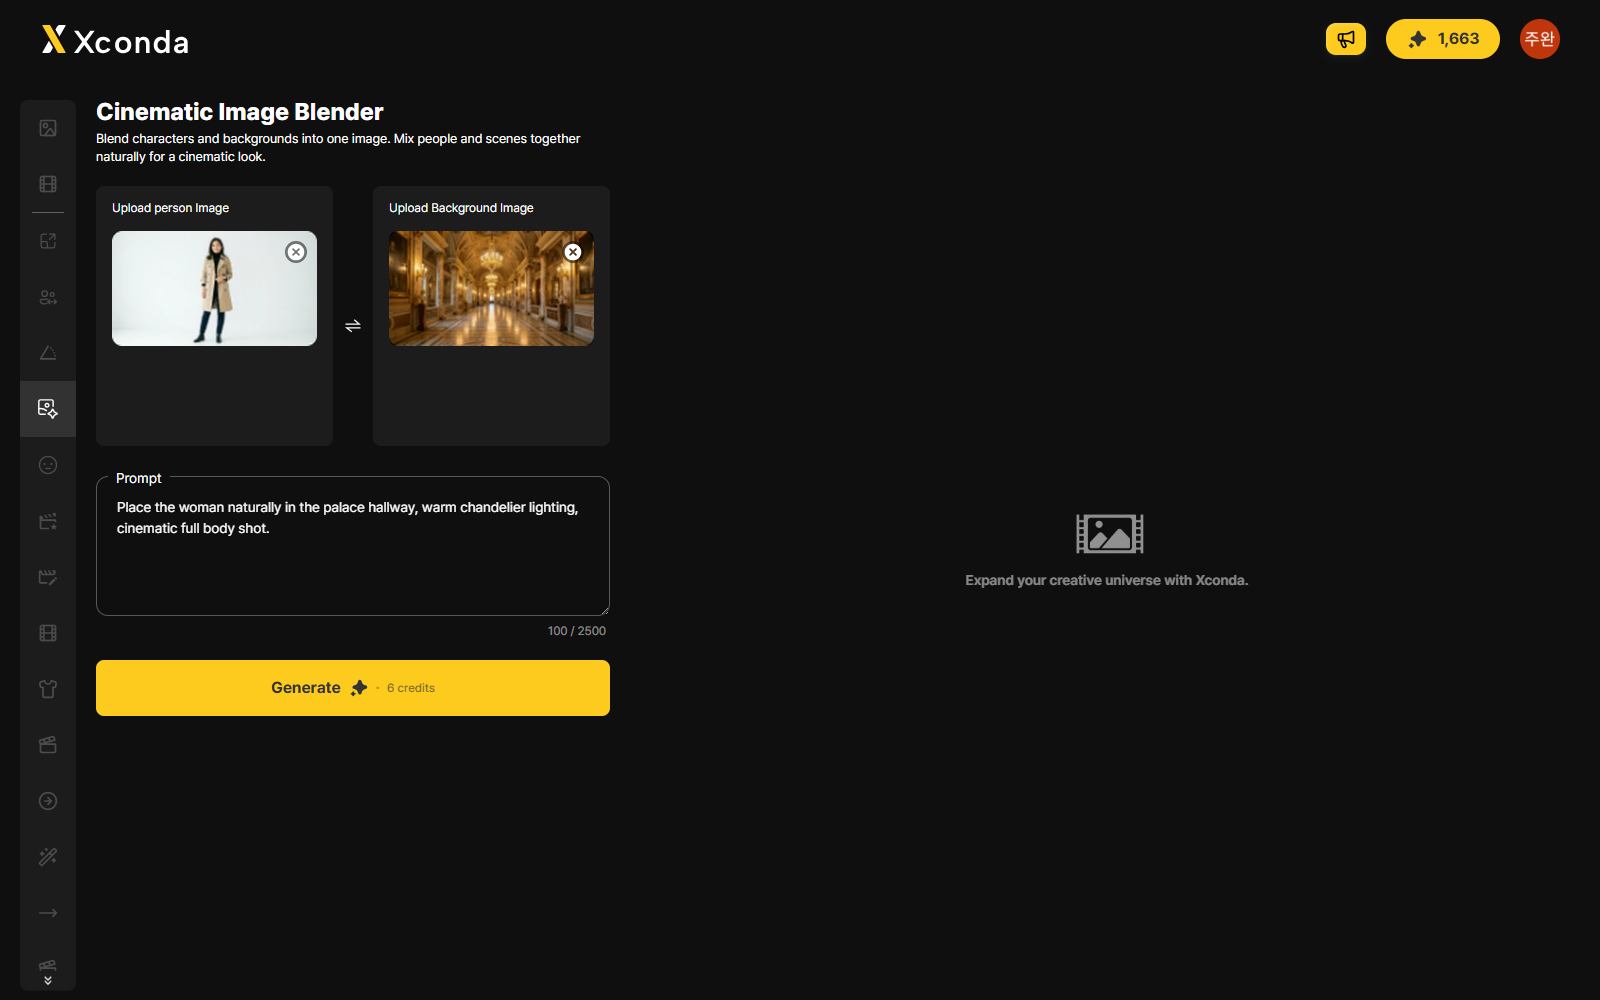
Fig. 10.01Click the Generate button
- Generate button -
- Step 01 -

Click Generate

After uploading person and background images and entering any required prompt, click the yellow Generate button.

- Step 02 -

Click OK in the confirmation dialog

Click OK in the confirmation dialog to begin generation.

- Required -
The Generate button will not activate if a required image is missing.
009 - GenerateRun
Chapter 10Result
P. 010
10
- Result -

Review the result

When generation completes, the blended image is displayed in the right result area.
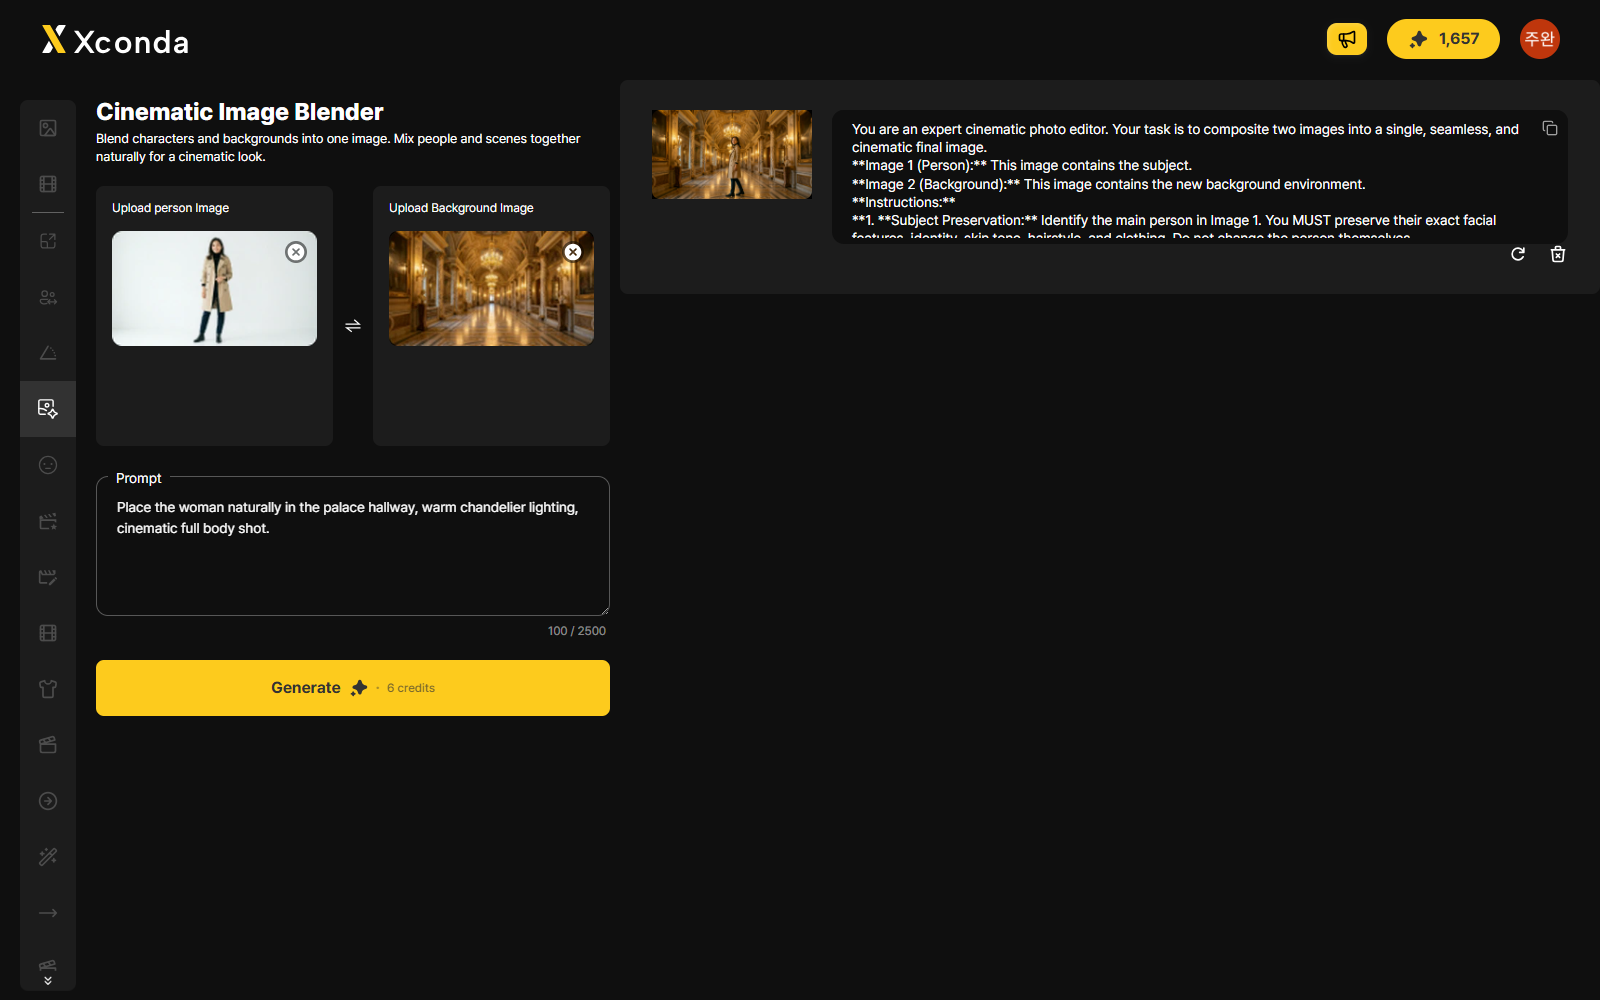
Fig. 11.01Review the result
- Result panel -
- Result -

Blended image + prompt

The result card displays the generated image together with the prompt text.

- Card icons -

Share · Re-run · Delete

In the lower right of the card, an external share icon (copy to clipboard), re-run icon, and delete icon are displayed.

010 - ResultReview
Chapter 11Image Manage
P. 011
11
- Image Manage -

Manage the result image

Hover the cursor over a result image to manage the output.
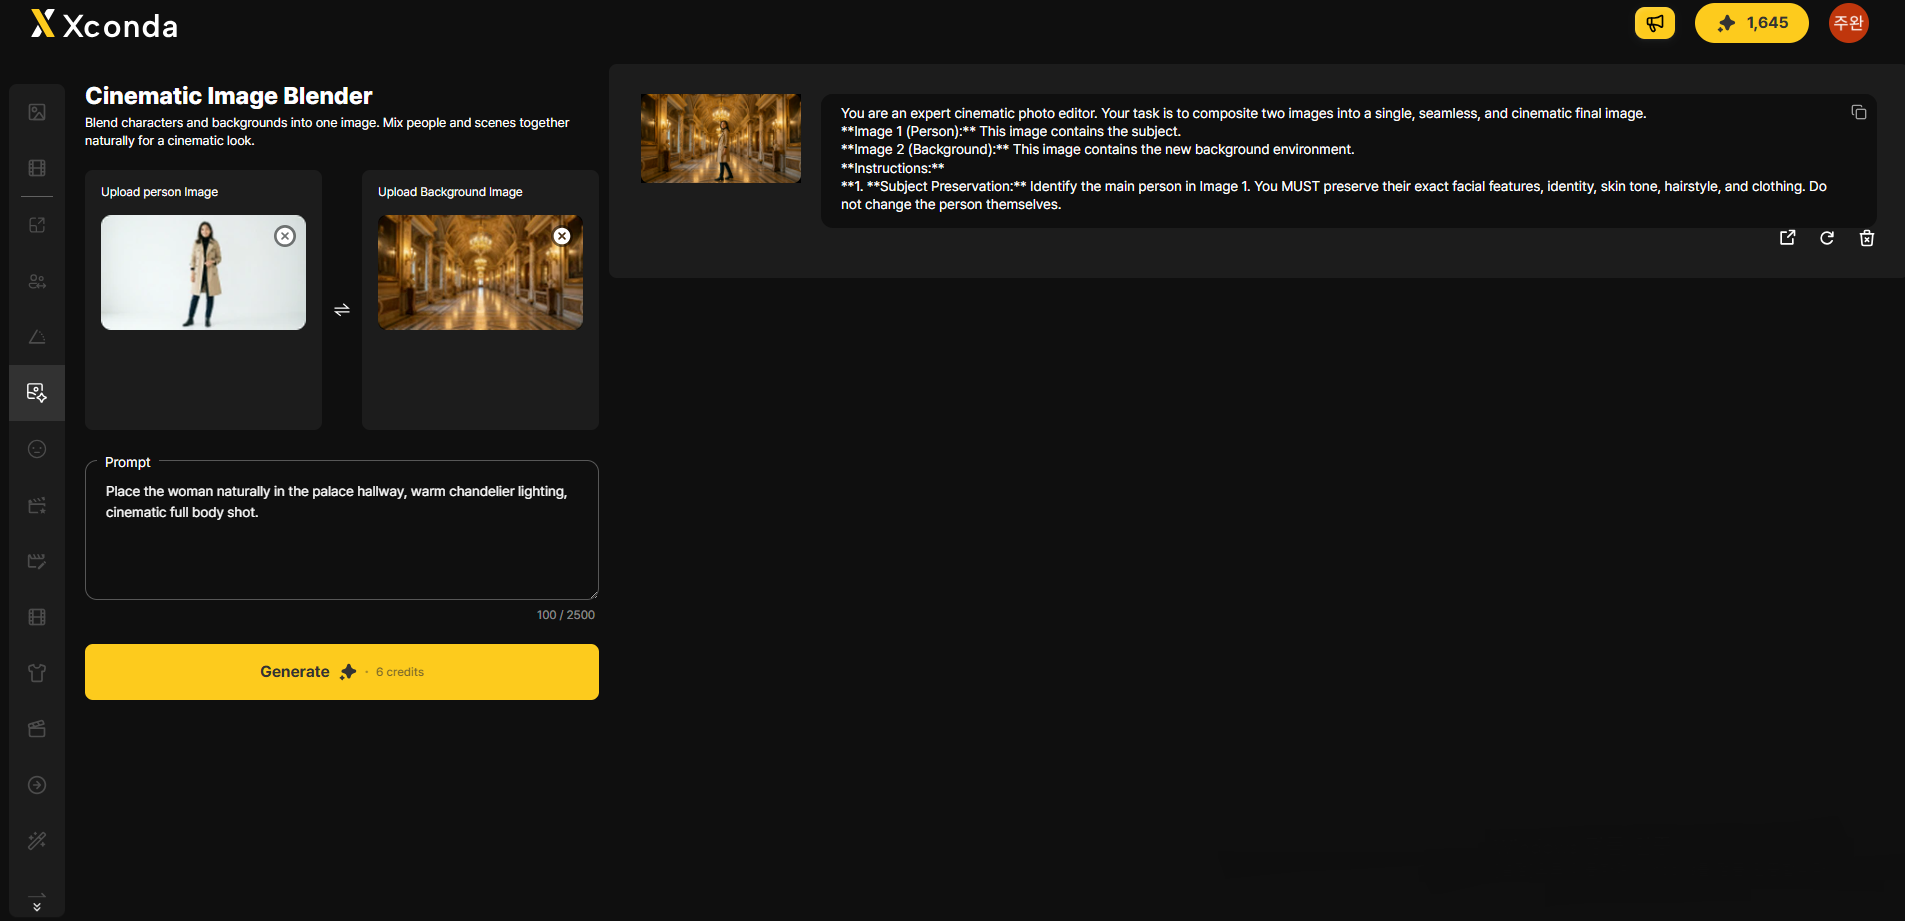
Fig. 12.01Manage the result image
- Manage icons -
- Hover -

Manage icons appear

Hovering the cursor over a result image displays management icons.

- Actions -

Download · Edit prompt · Delete

You can download the result, edit the prompt, or delete it from the history.

011 - Image ManageManage
Chapter 12Detail View
P. 012
12
- Detail View -

Detail view

Click a result image to open the detail view.
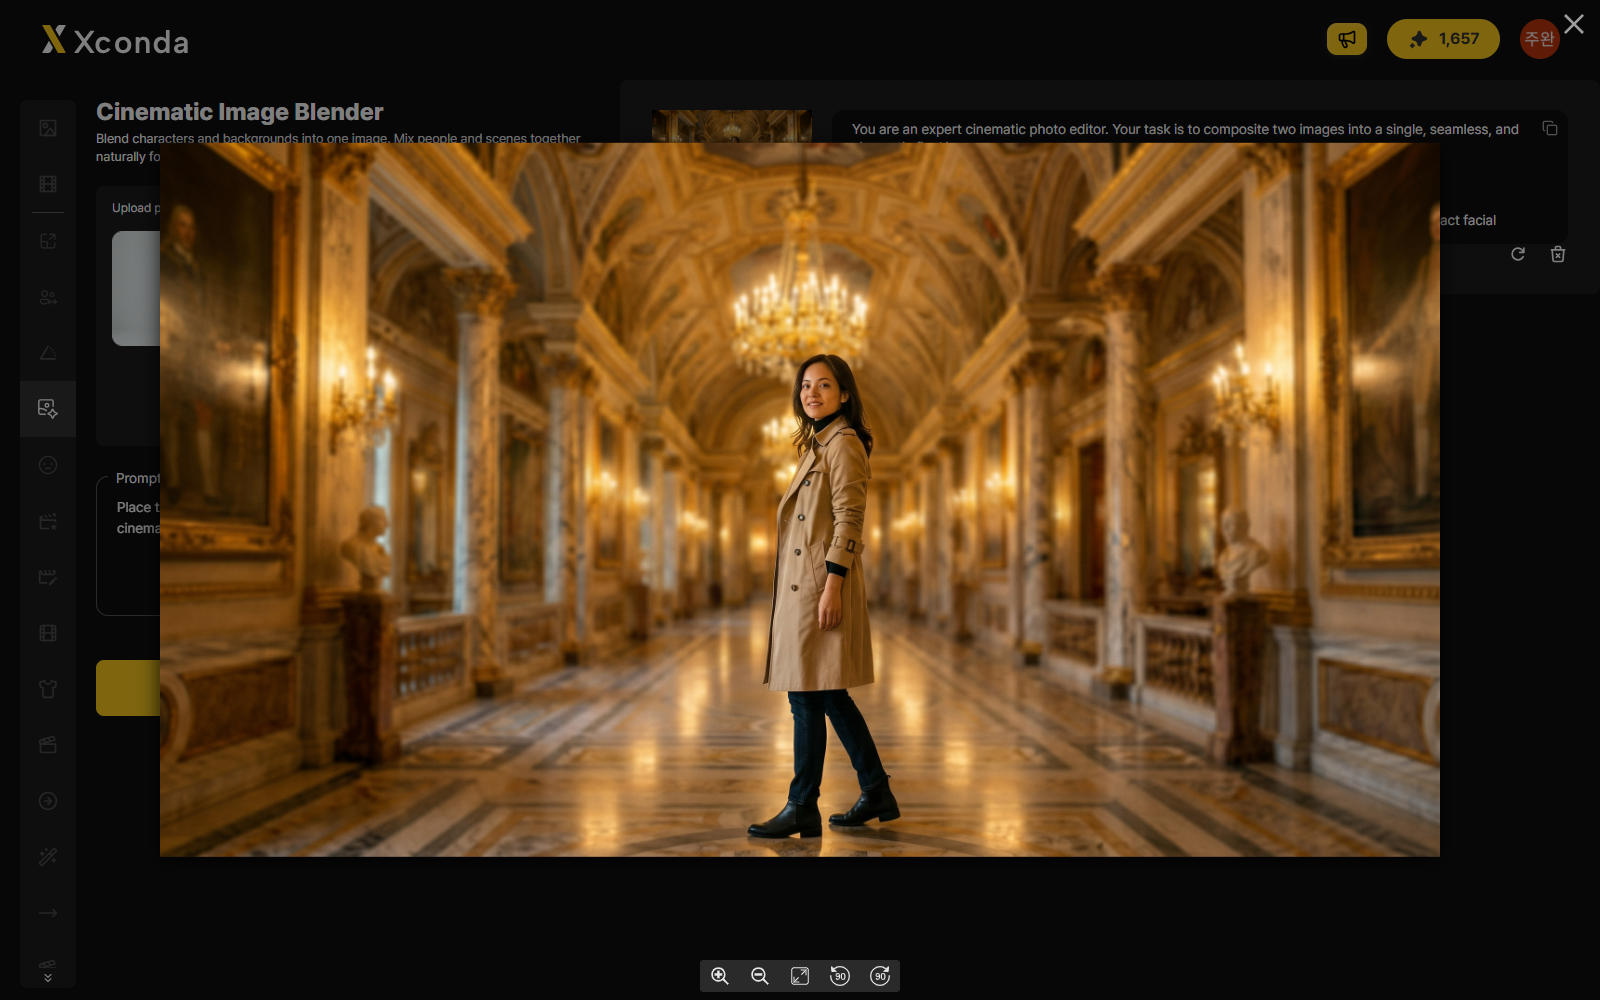
Fig. 13.01Detail view
- Detail view controls -
- Step 01 -

Click image

Click a result image to open the detail view. The image is shown enlarged.

- Controls -

Zoom · Fit · Rotate

Use the bottom icons to zoom in, zoom out, fit to screen, or rotate.

012 - Detail ViewView