Xconda / 2026No. 07

AUTO ANGLE GENERATOR

A workflow guide for auto-generating up to 34 camera angles from a single image.

User GuideTutorial12 Chapters2026
- Guide Contents -

Purpose · Use Cases · Features · Source Tips · Entry · Image Upload · Camera Angles · 34 Options · Generate · Result · Detail View · Download

Chapter 01Purpose
P. 001
01
- Purpose -

Auto-generate angles from a single image

Real photo shoots require dozens of takes — changing lighting, camera position, and tripod height. Auto Angle Generator replaces this process with a single source image.

- Traditional method -

Lighting · camera · crew

Real shoots require dozens of takes — adjusting lighting, camera position, and tripod height across each variation.

- Auto Angle Generator -

Auto-convert from 1 source

Get product or character images from various angles without a location, equipment, or crew.

- Source -

1 Image

A single source image

- Output -

34 Angles

Up to 34 camera angles

001 - PurposeOverview
Chapter 02Use Cases
P. 002
02
- Use Cases -

When to use it

Product photography supplement, e-commerce detail pages, lookbook / portfolio, and planning / draft stages.

01
Product photography supplement
Expand a single front-facing product shot into top view, low angle, side view, and other compositions.
02
E-commerce detail pages
Quickly fill detail pages with multi-angle product images.
03
Lookbook / portfolio
Convert a single character / clothing image into multiple viewpoints.
04
Planning / draft
Pre-check angle drafts before the actual shoot.
002 - Use CasesWhen
Chapter 03Features
P. 003
03
- Features -

Feature overview

34 angle options, batch / individual selection, batch / individual generation, detail view and download.

- 01 -
34 camera angle options
Choose from 34 angles including Eye Level, High Angle, Aerial View, Low Angle, Close Up, Side Profile, and more.
- 02 -
Select All / Deselect All
Select all available angles at once, or clear the selection.
- 03 -
Individual + batch generation
Generate only the angles you choose, or generate all of them at once.
- 04 -
Detail view + download
Click a result to zoom / fit / rotate. Each image can be downloaded individually.
003 - FeaturesCapabilities
Chapter 04Source Tips
P. 004
04
- Source Image Tips -

Source image preparation

For higher result quality, the source image should meet these conditions.

01
Simple background
White / solid backgrounds or clean studio backgrounds yield the highest angle conversion accuracy.
02
Centered subject
The subject should be centered. Cropped or off-center images may distort during conversion.
03
High resolution
Higher resolution yields better quality. Low-resolution sources lose detail in the result.
04
Frontal capture
Front-facing or slightly angled images are recommended. Extreme angles may convert unnaturally.
05
Single subject
Multiple overlapping subjects or complex hand / arm crossings reduce conversion quality.
004 - Source TipsPreparation
Chapter 05Entry
P. 005
05
- Entry -

Open Auto Angle Generator

Click the 5th icon on the left vertical sidebar.
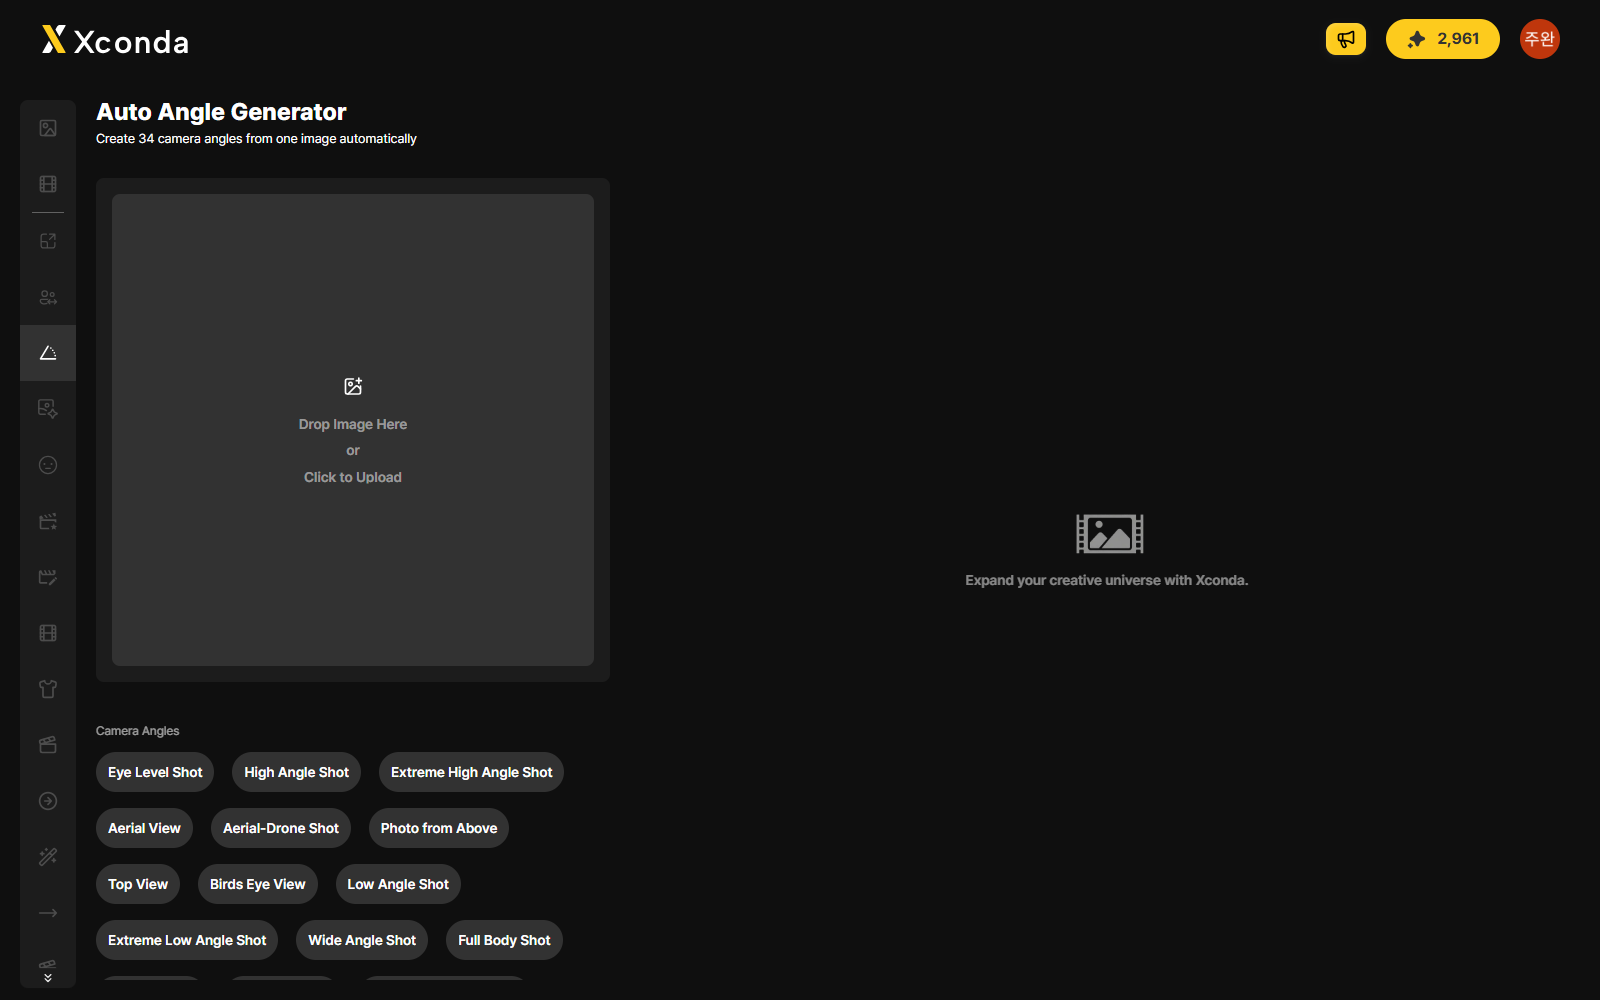
Fig. 06.01Open Auto Angle Generator
- Open Auto Angle Generator -
- Step 01 -

Locate the 5th sidebar icon

Find the 5th icon on the left vertical sidebar. The icon is a triangle with angle markings.

- Step 02 -

Click to open

Click the icon to open the Auto Angle Generator workspace.

005 - EntryOpen
Chapter 06Image Upload
P. 006
06
- Drop Image Here -

Upload an image

Click the upload area to select a source image.
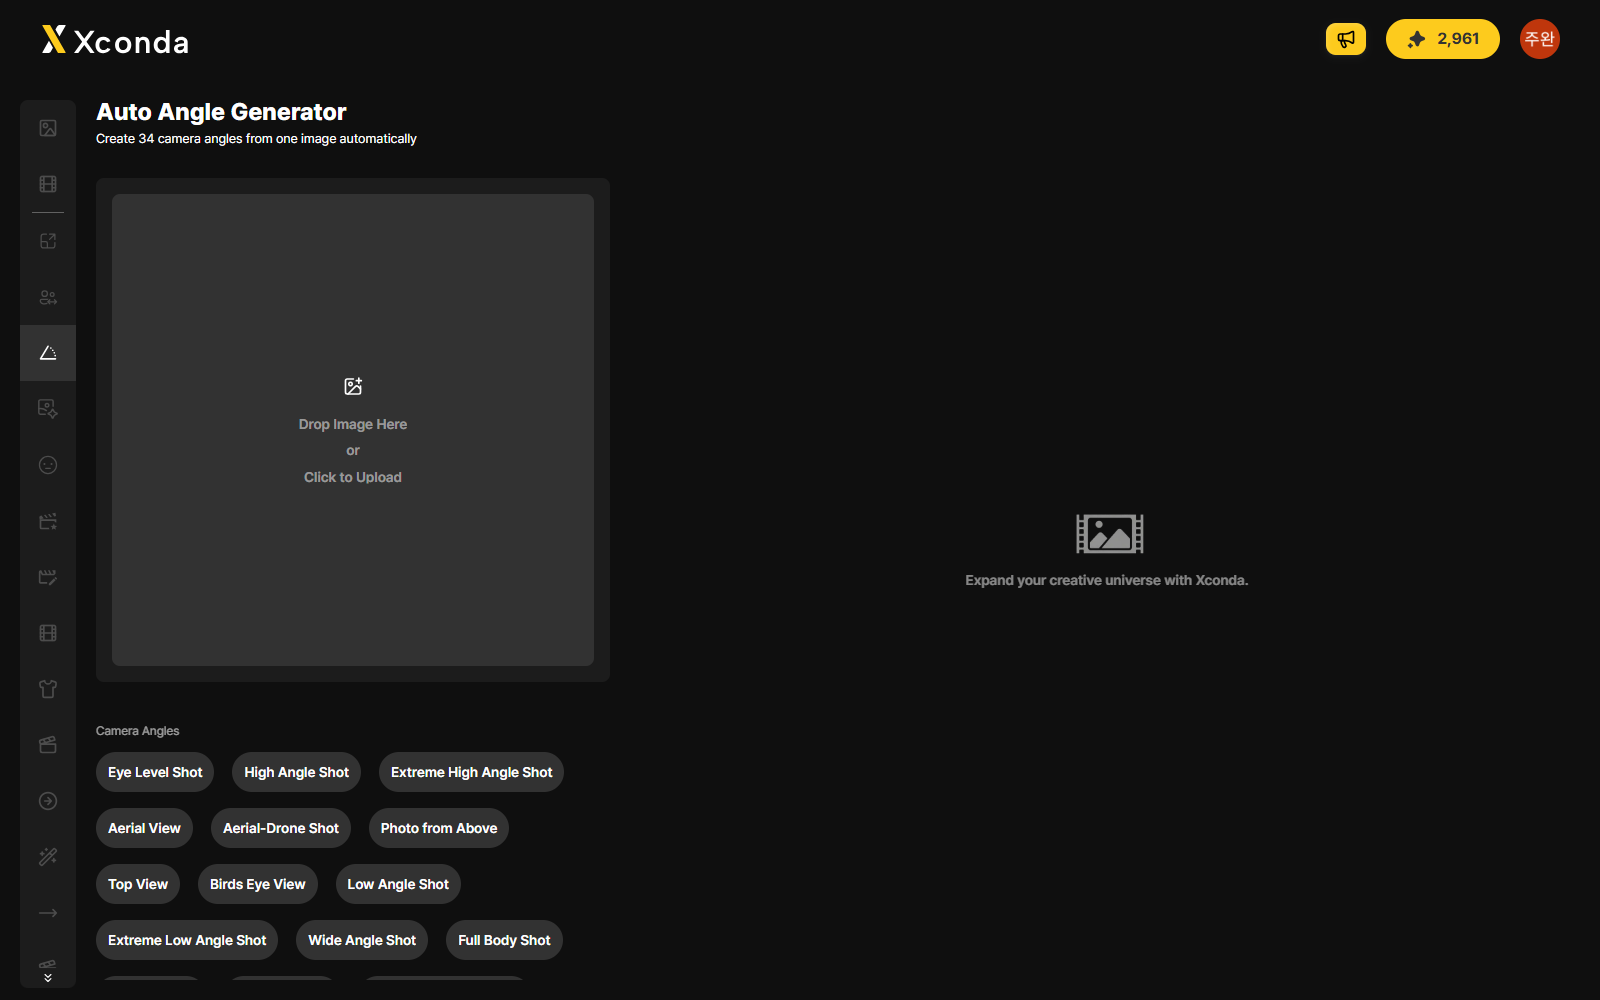
Fig. 07.01Upload an image
- Image upload area -
- Step 01 -

Click the upload area

Click the area showing Drop Image Here, or, Click to Upload.

- Verify -

Preview is shown

After uploading, a preview image is displayed.

- Required -
The Generate button will not activate if the image is missing.
006 - UploadImage
Chapter 07Camera Angles
P. 007
07
- Camera Angles -

Select camera angles

Click camera angle buttons to select. Selected buttons turn yellow.
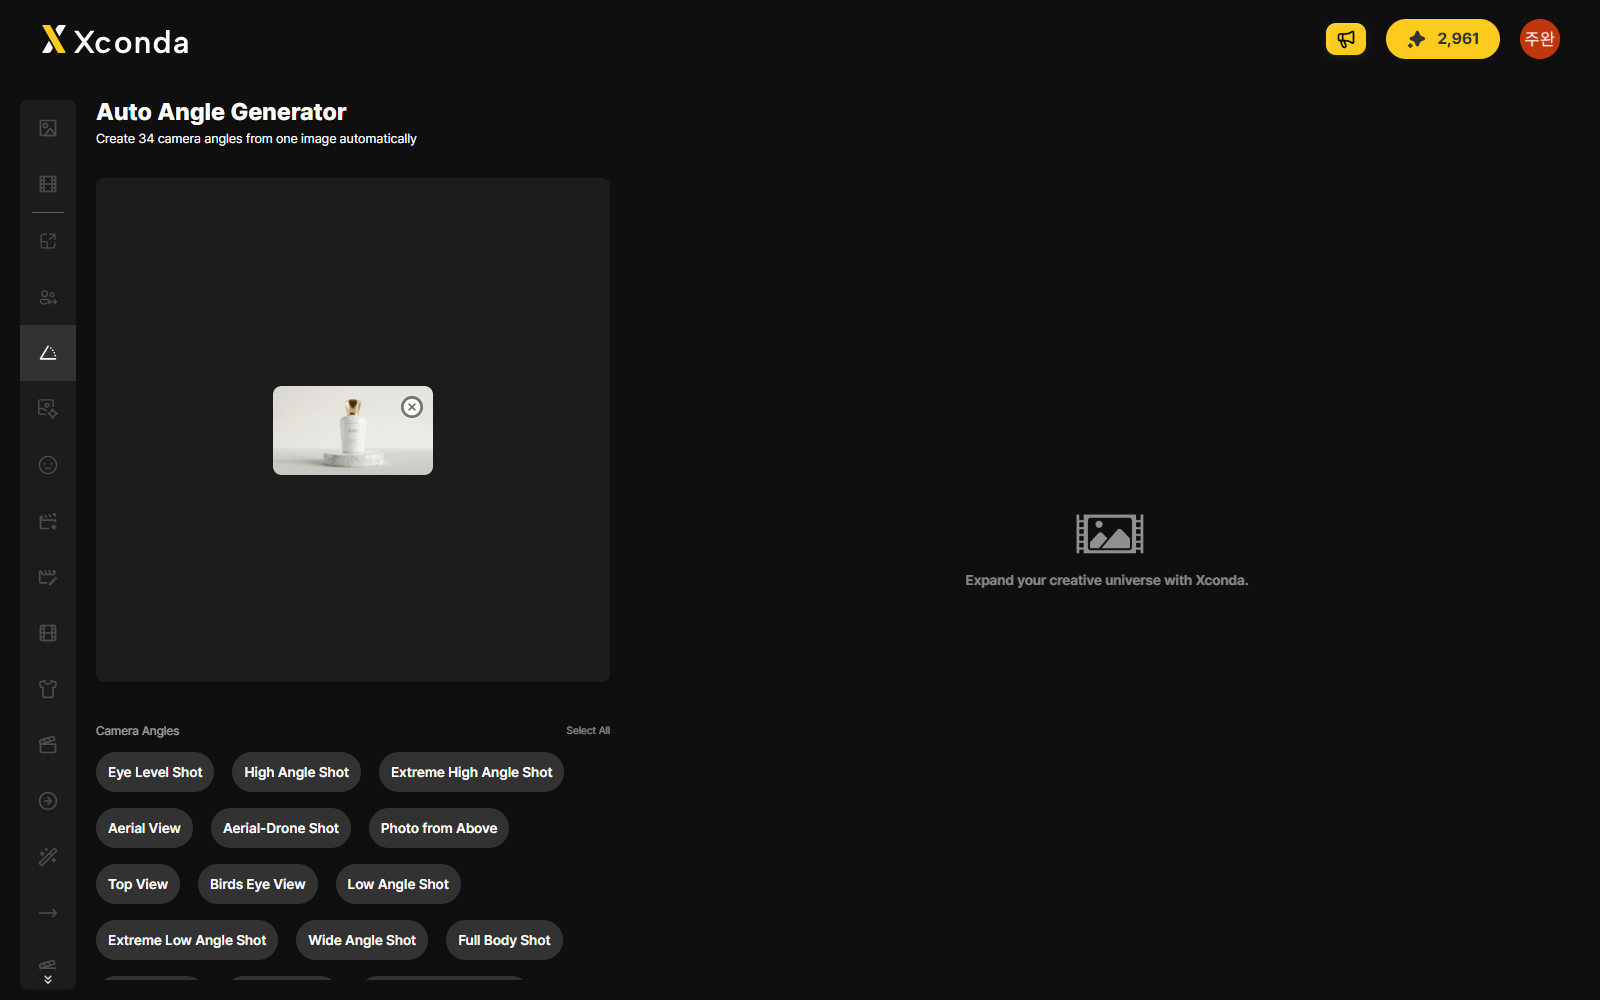
Fig. 08.01Select camera angles
- Camera angle selection -
- Step 01 -

Select individual angles

Click individual camera angle buttons to select. Selected buttons turn yellow.

- Step 02 -

Select All / Deselect All

Click Select All to select all available angles at once. Click Deselect All to clear the selection.

- Required -
The Generate button will not activate without at least one angle selected.
007 - Camera AnglesSelection
Chapter 08Angle Options
P. 008
08
- Angle Options -

Camera Angles reference

Available camera angle types and their characteristics.

Eye Level Shot
Camera at eye-level baseline
High Angle Shot
Looking down from above
Extreme High Angle
Looking down from very high
Aerial View
Aerial perspective
Aerial-Drone Shot
Drone-like aerial angle
Photo from Above
Shot from directly above
Top View
Top-down frontal view
Birds Eye View
Bird's eye perspective
Low Angle Shot
Looking up from below
Extreme Low Angle
Looking up from very low
Wide Angle Shot
Wide field of view
Full Body Shot
Full subject in frame
Medium Shot
Medium distance framing
Close Up Shot
Close framing
Extreme Close Up
Very close framing
Detail Shot
Emphasizes detail elements
Side Angle Shot
Side perspective
Side Profile Shot
Side profile focus
Two Shot
Two-subject composition
Shot from Behind
View from behind
Over-the-Shoulder
Over-the-shoulder POV
Point of View (POV)
POV-based angle
Tracking
Tracking composition
Tilted Shot
Tilted angle
Dutch Angle Shot
Diagonally tilted angle
Diagonal Shot
Diagonal composition
Off-center Close Up
Off-center close-up
Off-center Shot
Off-center composition
Rule of Thirds
Rule-of-thirds composition
Silhouette Shot
Silhouette focus
Candid Shot
Natural-moment angle
Foot on the Pavement
Low ground-level view
008 - Angle OptionsReference
Chapter 09Generate
P. 009
09
- Generate -

Generate Angles button

After completing the image upload and angle selection, click the yellow Generate Angles button at the bottom.
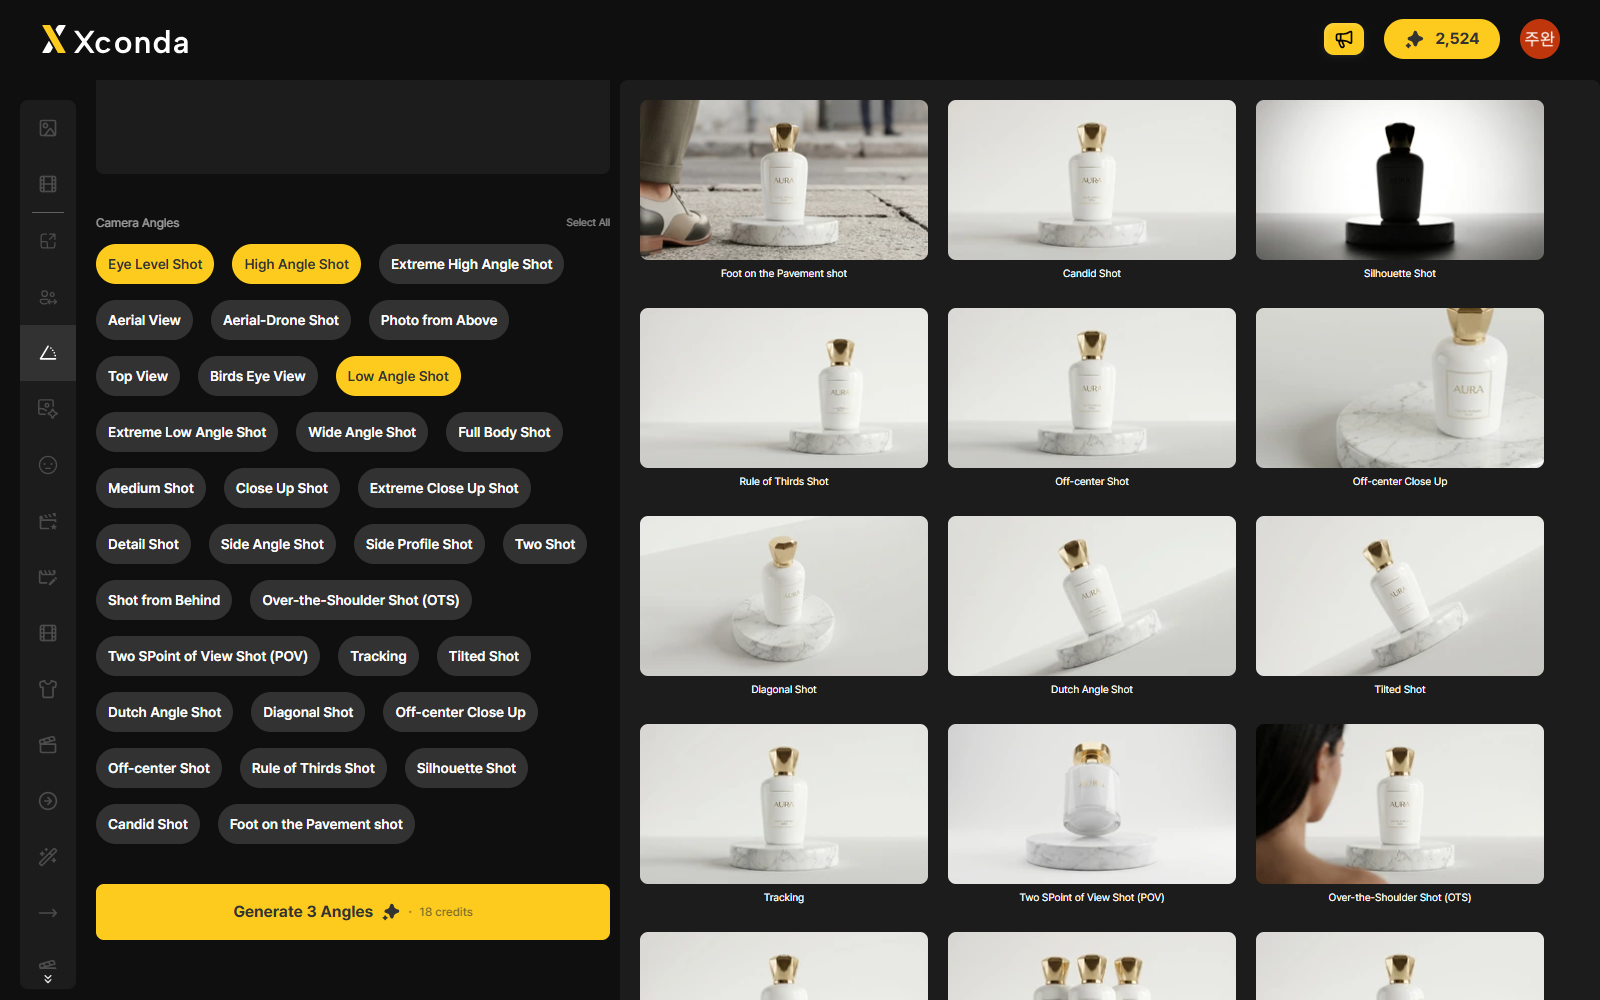
Fig. 10.01Generate Angles button
- Generate button -
- Step 01 -

Click Generate

After completing the image upload and angle selection, click the yellow Generate Angles button at the bottom.

- Run -

Generation begins

Generation of the selected angles begins.

009 - GenerateRun
Chapter 10Result
P. 010
10
- Result -

Review the result

When generation completes, the selected angle result images appear in the right result area.
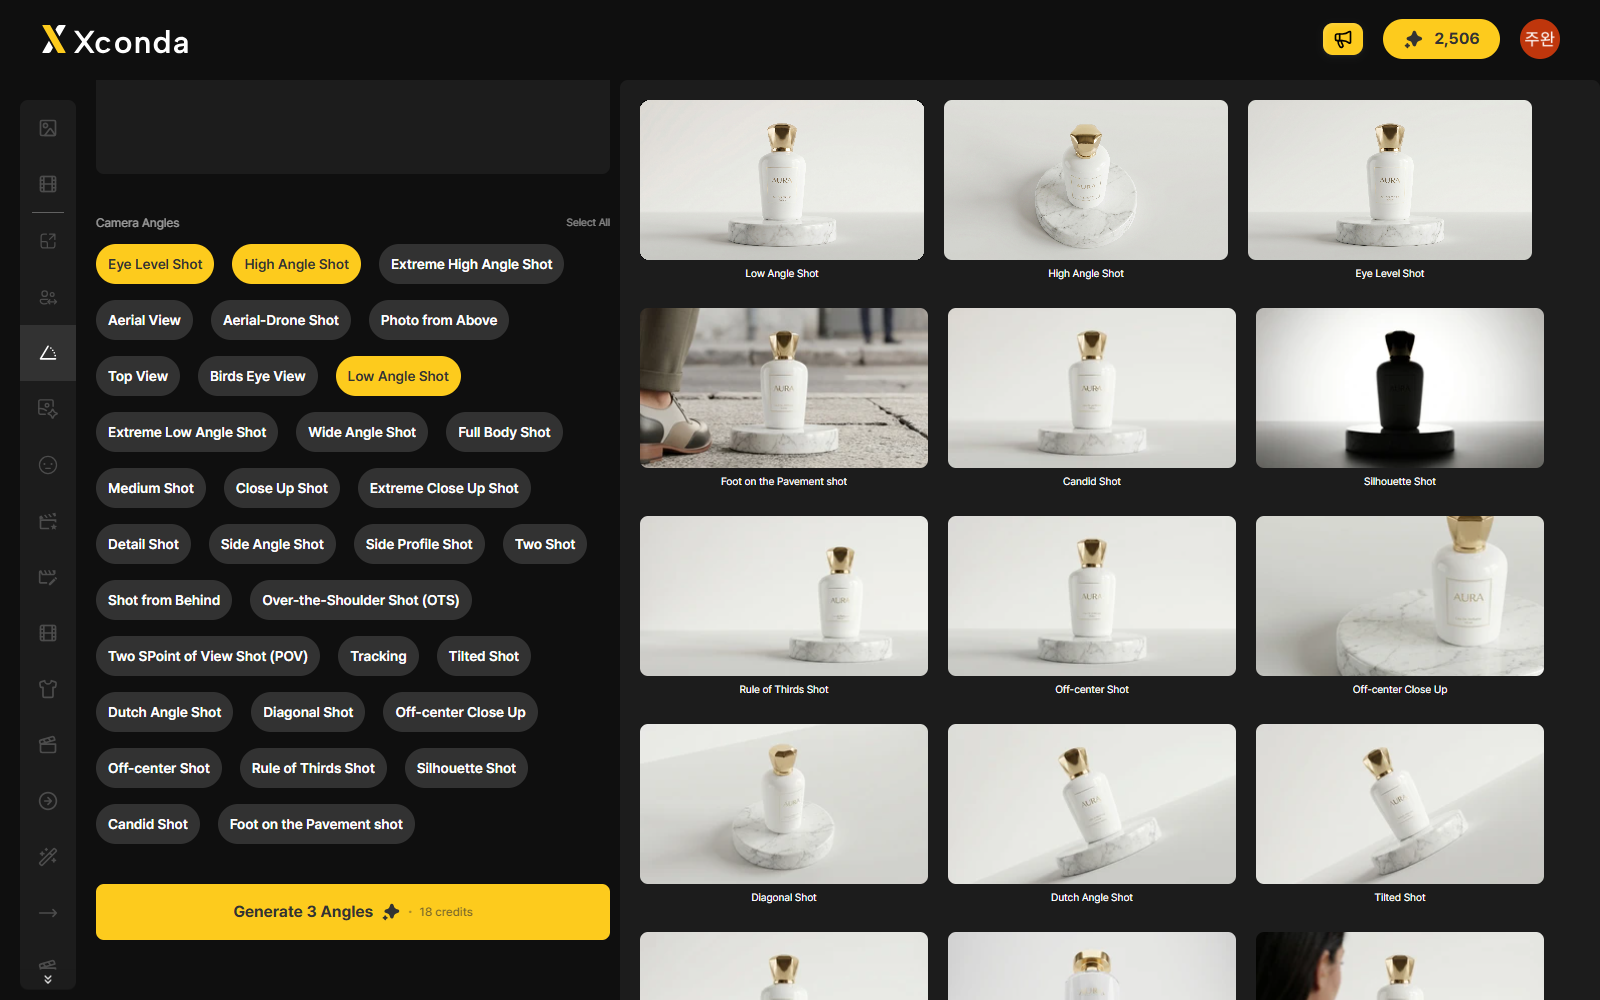
Fig. 11.01Review the result
- Result panel -
- Result -

Per-angle results displayed

When generation completes, the selected angle result images appear in the right result area.

- Label -

Angle name shown

Each result has its angle name displayed below.

010 - ResultReview
Chapter 11Detail View
P. 011
11
- Detail View -

Detail view

Click a result image to open the detail view.

Fig. 12.01Detail view
- Detail view controls -
- Step 01 -

Click image

Click a result image to open the detail view. The image is shown enlarged.

- Controls -

Zoom · Fit · Rotate

Use the bottom icons to zoom in, zoom out, fit to screen, or rotate.

011 - Detail ViewView
Chapter 12Download
P. 012
12
- Download · Delete -

Download and delete

Hover over a result image to access individual download and delete.
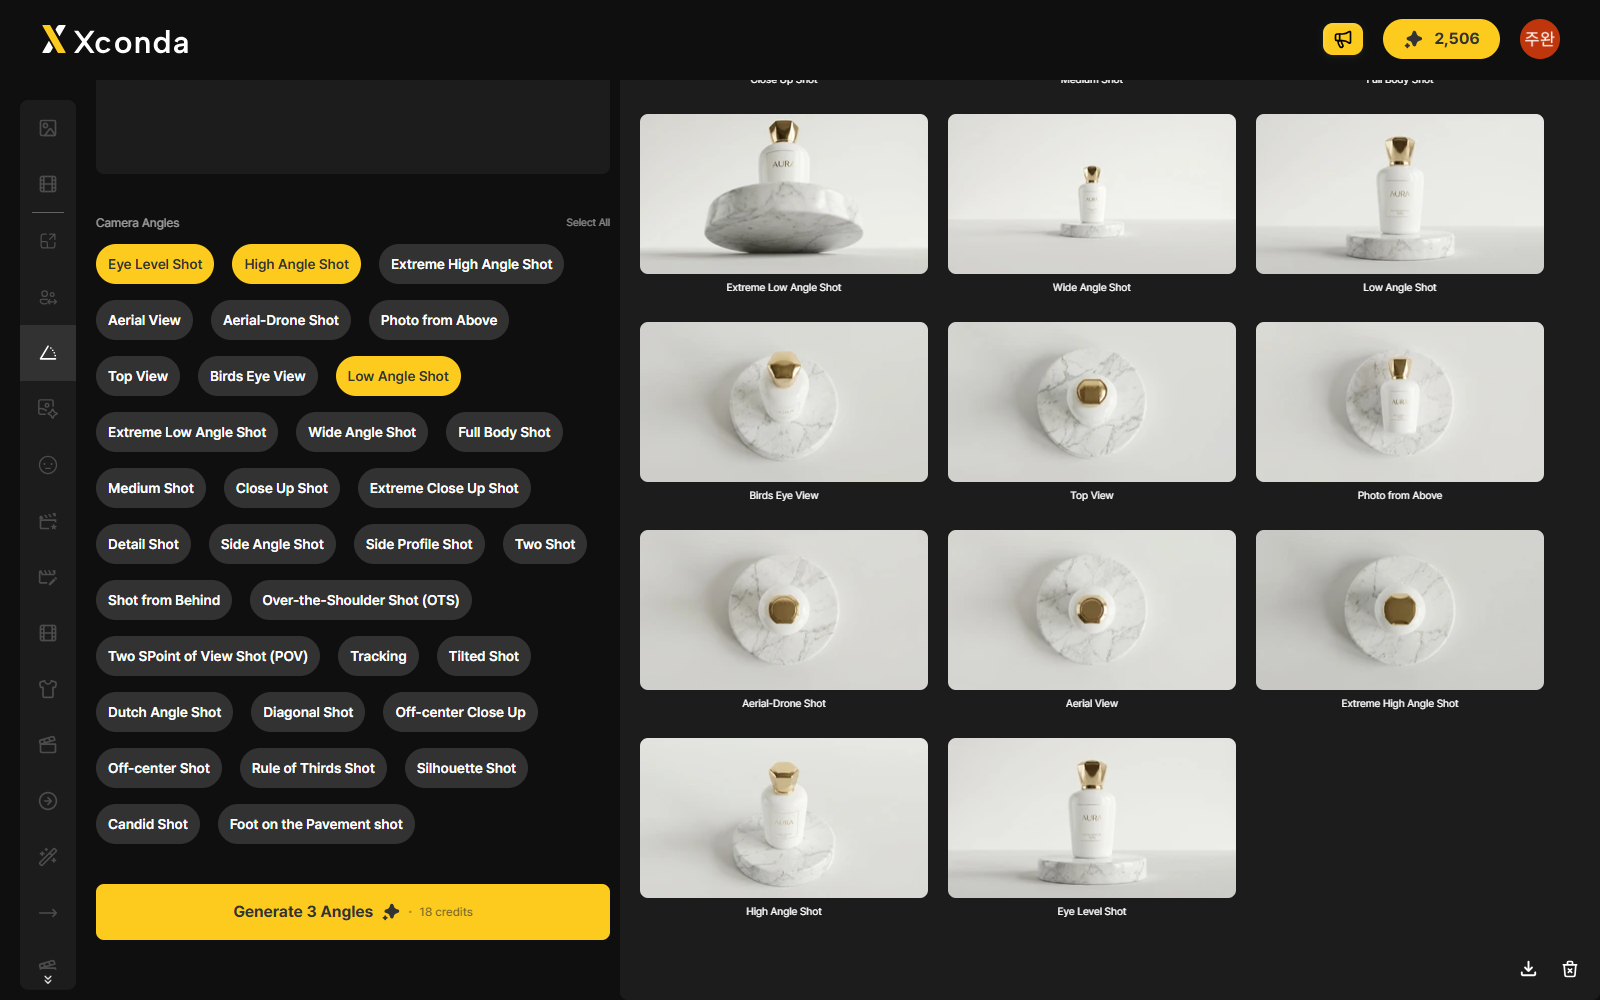
Fig. 13.01Download and delete
- Download / delete icons -
- Step 01 -

Hover the image

Hover the cursor over a result image. Download and delete icons appear.

- Action -

Download / Delete

Click the download icon to save that image, or the delete icon to remove it from the results.

012 - DownloadFinal Step