DIRECTORS CUT
User Manual - from image engine selection to 9-cut grid download.
Getting Started · Image Engine · Year & Location · Scenario · Director Style · Art Style · Product / Model · Generate · Edit · Download
Open Directors Cut
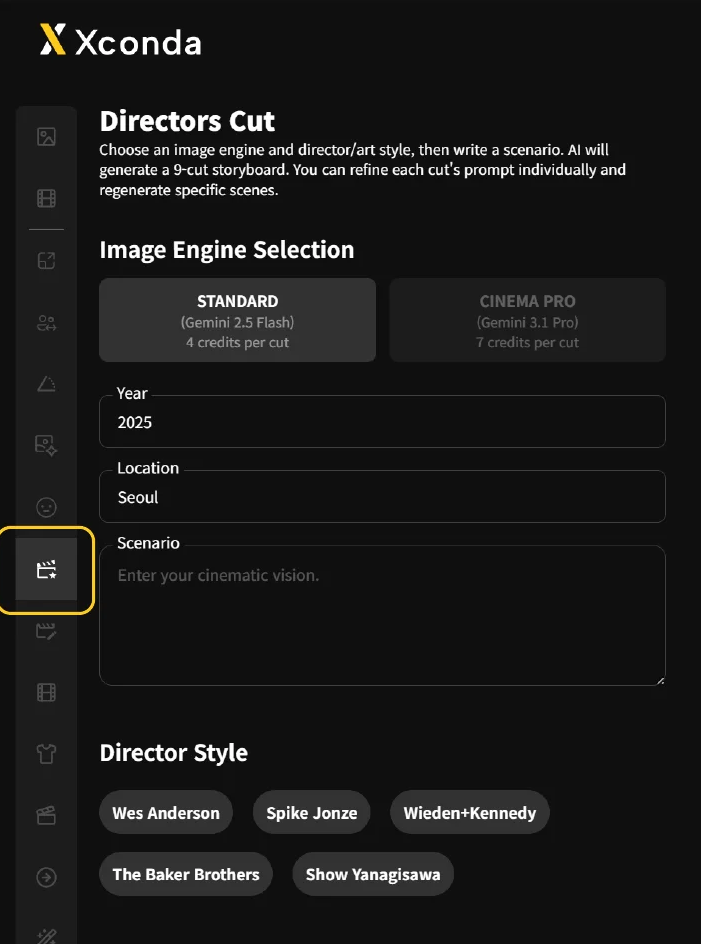
Click the 8th icon on the left vertical sidebar - the one inside the yellow frame - to open Directors Cut.
Locate the sidebar icon
On the left vertical navigation bar, find the 8th icon from the top. It is highlighted with a yellow frame.
Click to open
Click the icon once to open the Directors Cut workspace.
Select an image engine
Choose between two engines based on your work goal - drafting or final delivery.
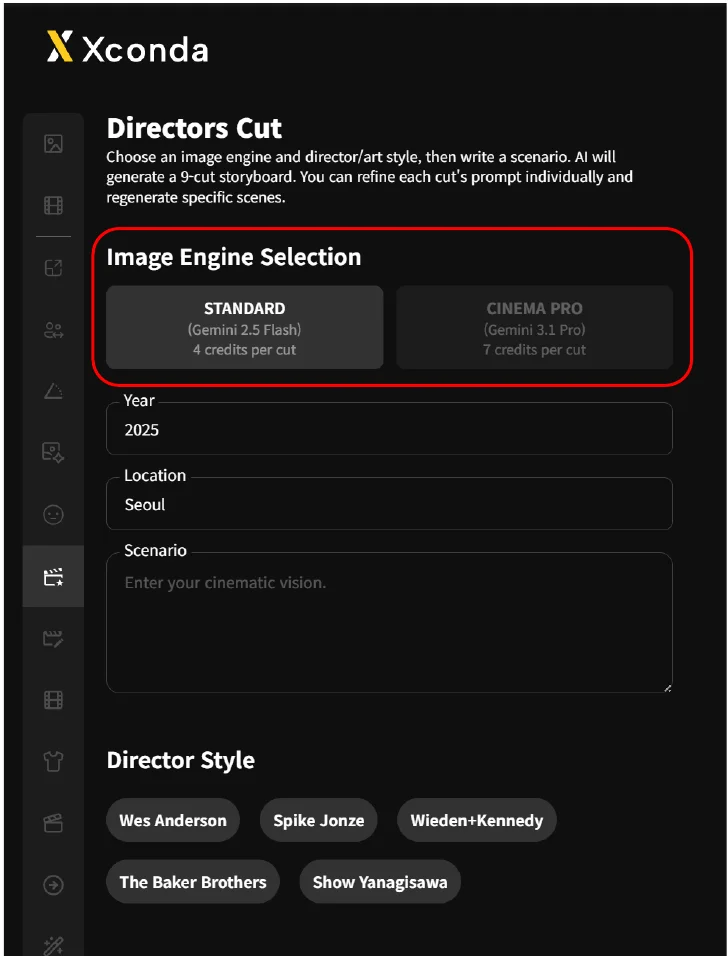
For drafts and ideation
Fast generation with solid base composition, but limited detail. Best for drafts, idea exploration, and creating reference images.
For final ad / video output
Very high detail (skin, texture, lighting), strong cinematography understanding (close-ups, low angles, depth of field), naturalistic lighting, and excellent consistency across frames. Suitable for direct use in ads and video. Slower generation speed.
STANDARD
- SpeedFast
- CompositionSolid base framing
- DetailLimited
- Best forDrafts, ideation, references
CINEMA PRO
- SpeedSlower
- DetailVery high (skin · texture · light)
- CameraClose-up · low angle · depth
- LightingNaturalistic
- ConsistencyStrong across frames
- Best forAd / video ready output
Set time and place
A core step that determines the mood and mise-en-scène of the result. Fill in the Year and Location fields.
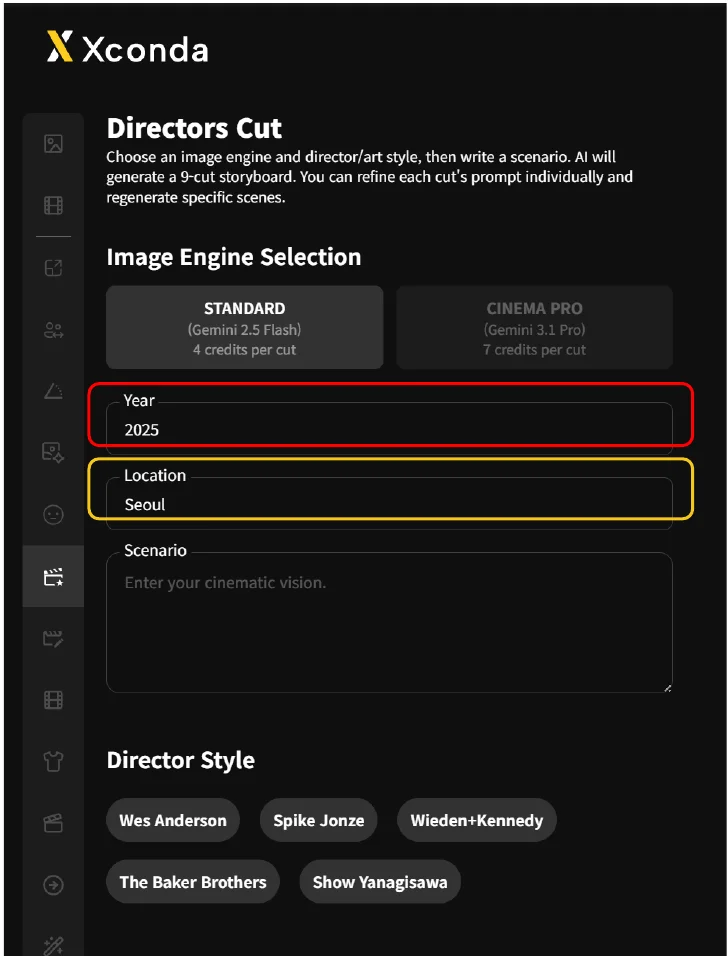
Year - temporal setting
Click the empty input below the Year field (red frame) and enter the era or period you want to set.
Location - spatial setting
Click the empty input below the Location field (yellow frame) and enter the city or place.
Write the scenario
Enter the story or situation you want to produce as text. The Scenario field is required.

Click and type
Click the Scenario field once and enter the story or situation you want to produce as text.
Meet the minimum length
Note. the input must exceed a minimum character count.
Select a director style
A core step that determines direction and tone-and-mood. Choose one of the 5 styles inside the red frame.
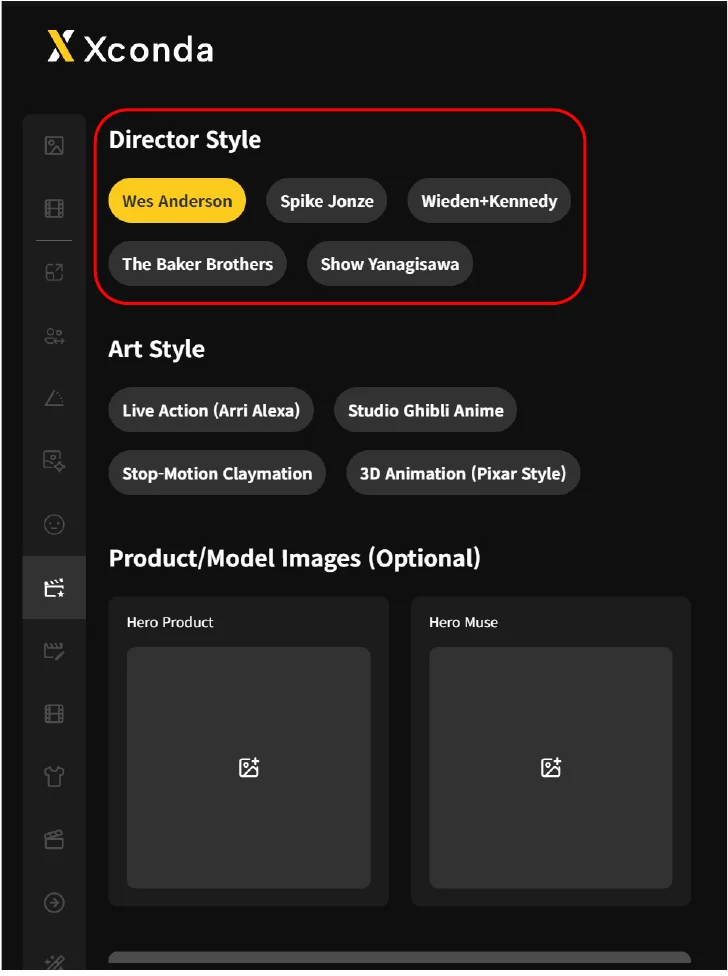
Each of the 5 styles carries its own directorial grammar. Detailed descriptions of each style appear on the next page.
ANDERSON
JONZE
+ KENNEDY
BROTHERS
YANAGISAWA
Style details
Reference for each director style as displayed on screen. Detailed descriptions of the 5 styles introduced on the previous page.

Match the style to the goal
For ordered composition, choose Wes Anderson. For emotional atmosphere, Spike Jonze. For strong messages, Wieden+Kennedy. For trendy advertising, The Baker Brothers. For quiet, emotion-led expression, Show Yanagisawa.
Regenerate with a different style
If the result does not match your intent, change the director style and regenerate.
Select an art style
Choose one of 4 options inside the red frame. This step determines the medium of the result - live action, animation, claymation, or 3D.
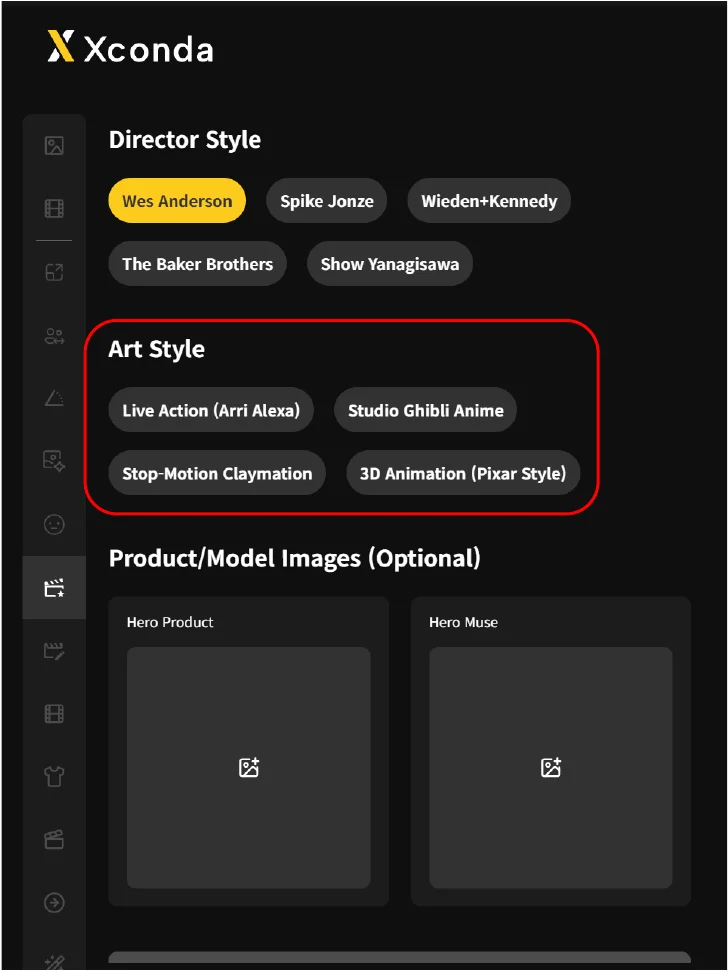
The visual language of the result changes completely depending on the medium chosen. Match it to the advertising goal and target audience.
ACTION
GHIBLI
CLAYMATION
ANIMATION
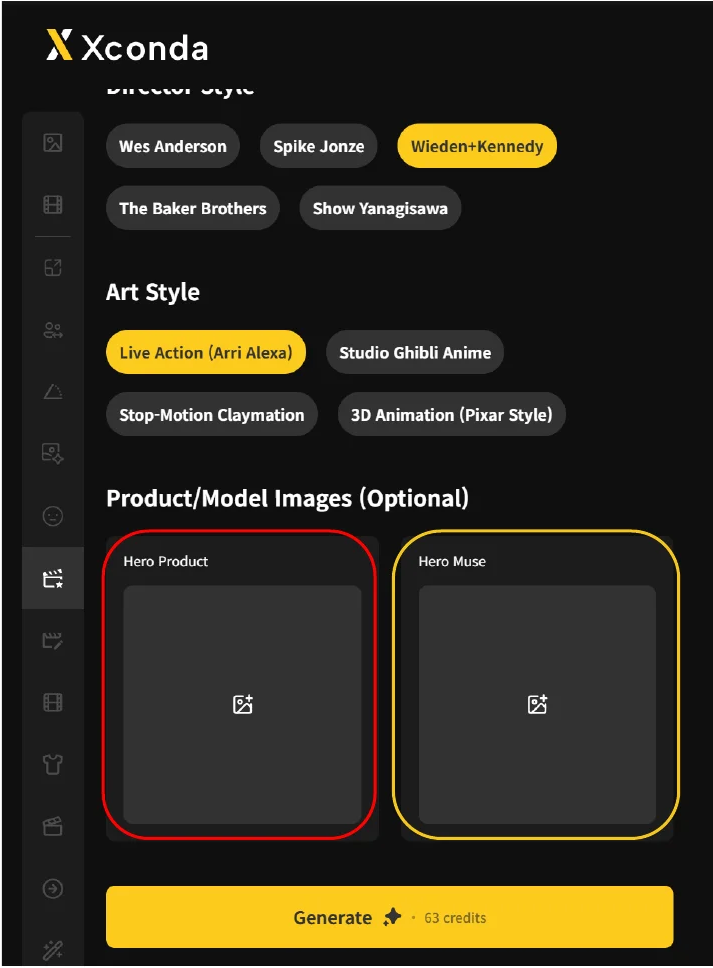
Attach product / model images
This step generates 9 cuts with visual continuity through facial recognition (face lock). It is optional - product-only campaigns are also supported.
Click or drag
Click the gray field directly below to select a file, or drag and drop the image file to attach the photo.
Use background-free images
In general, using images without backgrounds improves recognition accuracy and helps maintain consistency across the result.
HERO PRODUCT
Product imageAttach the product image that will appear in the advertisement. It functions as the central object across the result. Click the gray field directly below to insert, or drag and drop the image file to attach the photo.
HERO MUSE
Model imageAttach the model image that will appear in the advertisement. Use a front-facing photo where possible. Facial recognition (face lock) keeps the same model across all 9 cuts.
Click the Generate button
Click the Generate button activated at the bottom of the screen, inside the red frame.
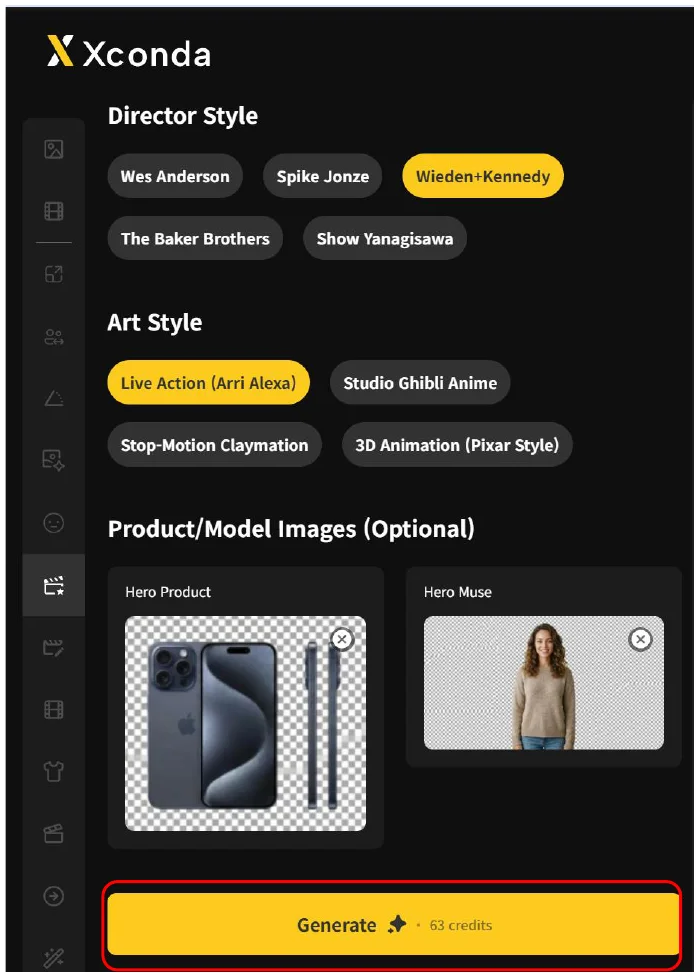
Confirm the button is active
When all required fields (Image Engine, Year, Location, Scenario, Director Style, Art Style) are filled, the Generate button at the bottom of the screen becomes active.
Click the button
Click the activated Generate button inside the red frame to begin image generation.
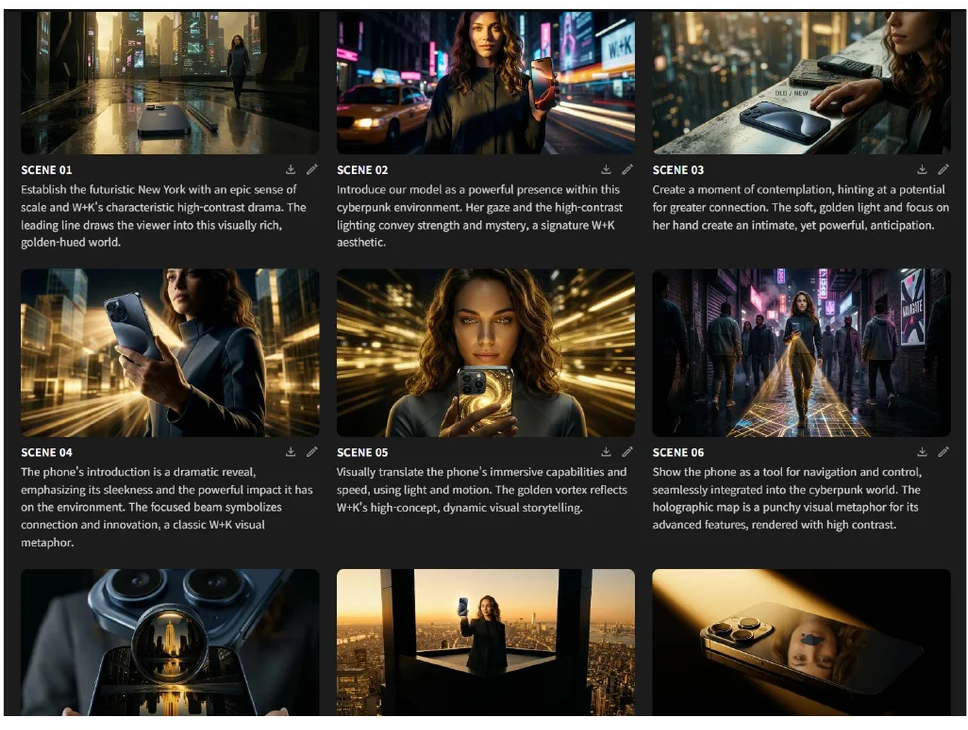
9-cut grid is generated
After clicking Generate, look to the right of the screen - a single grid composed of 9 images is generated.
Review the 9-cut grid
After clicking the Generate button, a single grid composed of 9 images appears on the right side of the screen.
Edit individual images
Each image can be edited individually. Click the pen icon to revise the prompt, then click Regenerate to re-render only that image.
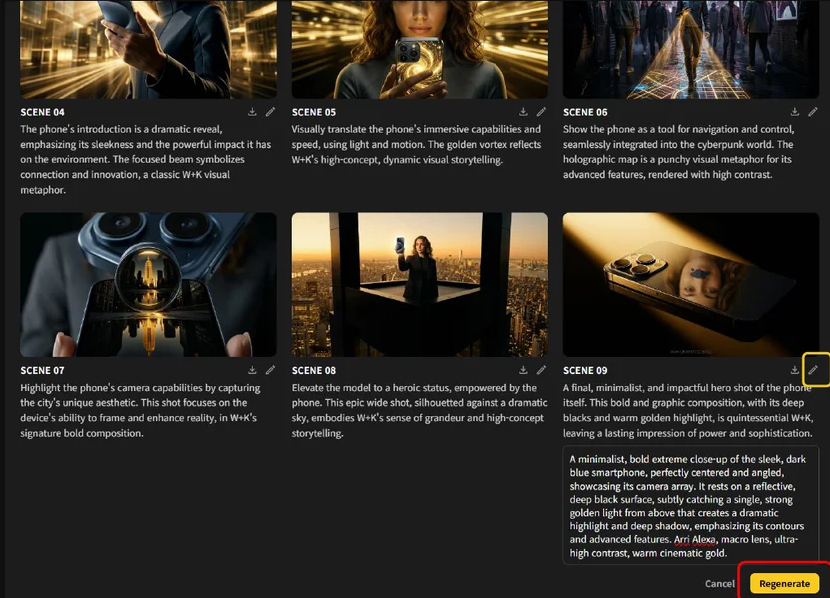
Click the pen icon
Click the pen-shaped icon inside the yellow frame at the bottom-right of the image to display its prompt.
Edit the prompt
Type the revised prompt into the field.
Click Regenerate
Click the activated yellow Regenerate button inside the red frame to re-render only that image.
Click pen icon
Pen icon inside the yellow frame at image bottom-right → prompt is displayed
Enter prompt
Type the revised prompt
Regenerate
Click the yellow Regenerate button inside the red frame → only that image is re-rendered
Review the edited result
In this example, the 9th image was edited to remove the figure. Only the chosen images are revised - any frame can be edited any number of times, in any order.

Download
You can download individual images or all 9 images at once.
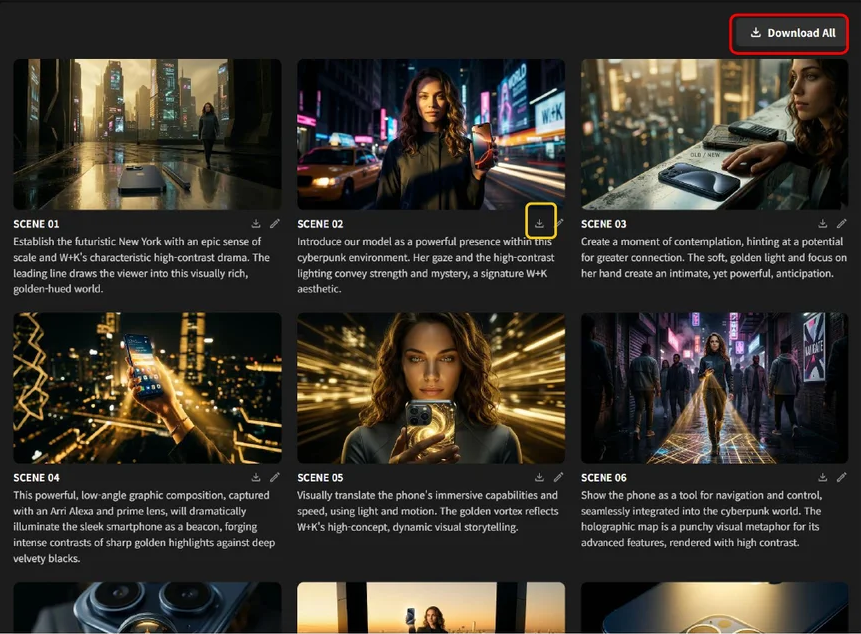
Individual download
Click the download icon inside the yellow frame to download a single image.
Download all
Click the Download All button inside the red frame to download all 9 images at once.